Raspberry Pi Home Server: Weekend Build Guide
Build a Raspberry Pi home server in a weekend - Pi-hole, NAS, Jellyfin, and a VPN, all on £100-130 of hardware. Beginner-friendly step-by-step.
A Raspberry Pi, a popular low-cost single-board computer often used as a home server, home server is the easiest possible introduction to self-hosting - for £100–£130 of hardware and one weekend of setup, you get an always-on box that blocks ads on every device in your house, stores your photos and videos, streams them to your TV, and gives you a private [VPN](/blog/do-you-need-a-vpn/) to use on coffee-shop WiFi. No subscription fees, no cloud storage anxiety, and roughly 5W of power draw to run the lot.
This guide is written for genuine beginners - if you have never used the terminal, never SSH'd into anything, never heard of Docker. We cover the parts you need, the four services to start with (Pi-hole, OpenMediaVault, Jellyfin, WireGuard VPN), and the order to install them in. By Sunday afternoon you will have a working home server. By next weekend, you will start finding excuses to add more services to it.
What parts and budget do you need?
All in, expect to spend £100-130 for a full setup that lasts five years
The full beginner kit consists of seven items. Stick to recommended brands - Pi accessories are the area where £5 of saving causes hours of troubleshooting later.
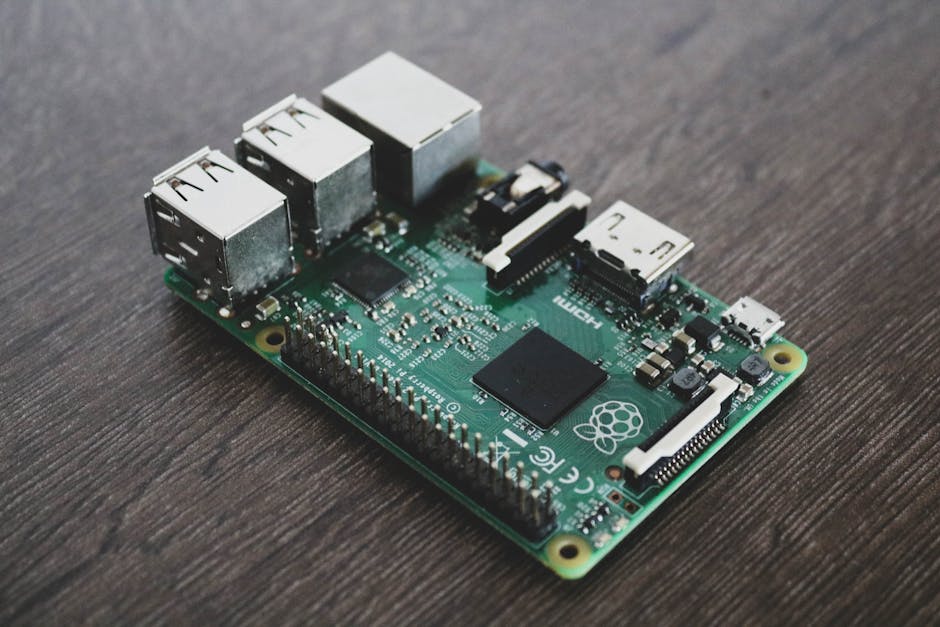
- Raspberry Pi 5 (4GB) - around £55. The 4GB model handles all four services comfortably. The 8GB model is overkill unless you are planning AI workloads on top.
- Official Pi 5 power supply (27W USB-C) - around £12. The Pi 5 needs a higher-wattage supply than older models; a generic phone charger will under-volt and cause crashes.
- Pi 5 active cooler (official) or a passive case with fan - around £10. The Pi 5 throttles aggressively without active cooling, especially under sustained load.
- microSD card (32GB SanDisk Extreme or Samsung EVO Plus) - around £10. This is the boot drive. Cheaper cards have higher failure rates and slower writes.
- External USB SSD (480GB-1TB, USB 3.0) - around £35-50. This is your NAS storage. SSDs are quiet, fast, and far more reliable than USB sticks for 24/7 use.
- Ethernet cable - around £5. Always wire the Pi to your router rather than relying on WiFi. Stability matters far more than speed for a server.
- HDMI micro cable (only if you do not have a spare) - around £5. You only need this for first-boot setup; once SSH is working you can run headless.
Total: roughly £132 at full retail, often £110–£120 with sales. The Pi 5 is the right starting point in 2026 - earlier models still work but the Pi 5's increased RAM and CPU headroom mean you will not outgrow it as quickly.
How to set up a Raspberry Pi home server
Flash Raspberry Pi OS to the SD card
Use Raspberry Pi Imager to write Raspberry Pi OS Lite (64-bit) to the microSD card, with SSH and Wi-Fi pre-configured during the install.
Assemble the Pi and find it on the network
Insert the SD card, attach the cooler, plug in Ethernet, then power on. Find the Pi's IP from your router's DHCP page and SSH in.
Install Pi-hole for network-wide ad blocking
Run the official Pi-hole installer, then point your router's DNS at the Pi. Every device on your network instantly loses ads.
Install OpenMediaVault for NAS storage
OMV turns the Pi into a web-managed NAS. Plug in a USB SSD, format it via the OMV web UI, and set up an SMB share for Time Machine / file backups.
Install Jellyfin for media streaming
Jellyfin is the free open-source media server. Point it at your OMV share and stream music, films, and TV to any device on the network - or remotely via WireGuard.
Install WireGuard for a private home VPN
PiVPN's WireGuard installer takes 5 minutes. Add a port-forward rule on your router and you can reach every Pi service from a coffee shop or a hotel room.
Set up automated backups
Schedule a weekly rsync from the Pi's home directory to the OMV share, plus a monthly off-site copy. SD-card failure is when, not if - plan for it from day one.
Step 1: How do you flash Raspberry Pi OS to the SD card?
15 minutes - Pi Imager makes this nearly idiot-proof
Download the Raspberry Pi Imager from raspberrypi.com/software and install it on your laptop. Pop the microSD card into the laptop's card reader (or a USB adapter), then in Imager:
- Click CHOOSE DEVICE and pick Raspberry Pi 5.
- Click CHOOSE OS → Raspberry Pi OS (other) → Raspberry Pi OS Lite (64-bit). Lite has no desktop environment, which is what you want for a server - it boots faster and uses far less RAM.
- Click CHOOSE STORAGE and pick the SD card.
- Click NEXT, then EDIT SETTINGS. This is the most important step.
In the settings dialog, set the hostname to something memorable like homeserver, set a username and a strong password, enable SSH (with password authentication), and configure your WiFi (although you will not actually use WiFi - see step 2). Click SAVE, then YES to apply the settings, and YES again to confirm overwriting the SD card. Wait 5-10 minutes for the flash to complete.
Step 2: How do you assemble and find the Pi on your network?
10 minutes - first boot tells you the Pi's IP address
Insert the SD card into the Pi, attach the cooler, plug in the Ethernet cable to your router, then connect the power supply. The Pi will boot. The first boot takes about 90 seconds, with the green activity LED flashing.
Now find the Pi's IP, the Raspberry Pi's network address, address. The easiest method is logging into your router's admin page (often 192.168.0.1 or 192.168.1.1) and looking at the connected devices list - your Pi will appear under the hostname you set. Note the IP address (something like 192.168.0.42).
From your laptop, open a terminal (macOS Terminal, Windows PowerShell, or a Linux terminal) and SSH in:
ssh [email protected]The first time you connect, you will see a security warning about an unknown host - type yes. Then enter the password you set in Imager. You are now in. Run sudo apt update && sudo apt full-upgrade -y to get all the latest packages - this takes 5-10 minutes - then sudo reboot.
Step 3: How do you install Pi-hole for ad blocking?
10 minutes - instantly blocks ads on every device in your house
Pi-hole is a DNS-level ad blocker. When any device on your network tries to reach an ad domain, your router asks Pi-hole for the IP address, and Pi-hole returns nothing - the ad never loads. It works on phones, tablets, smart TVs, and gaming consoles, including apps that bypass browser-based blockers like uBlock Origin.
SSH into the Pi and run:
curl -sSL https://install.pi-hole.net | bashThe installer is interactive. Accept the defaults for almost everything. When it asks for an upstream DNS provider, choose Cloudflare or Quad9. When it asks whether to install the web admin interface, say yes. At the end, write down the admin password it displays - you will need this for the dashboard.
Now point your router at Pi-hole. In the router's DHCP/DNS settings, change the DNS server from your ISP's default to your Pi's IP address. Save, reboot the router, and within a few minutes every device on your network will be using Pi-hole. Visit http://<your-pi-ip>/admin to see the dashboard - within an hour you will be blocking thousands of requests per day. Our Pi-hole introduction guide covers the dashboard and tuning in more detail.
Step 4: How do you install OpenMediaVault for NAS?
30 minutes - turn the Pi into a network-attached storage box
OpenMediaVault (OMV) is a free, web-managed NAS operating system that runs on top of Raspberry Pi OS. Plug your USB SSD into the Pi (use a powered USB hub if you have multiple drives - the Pi can struggle to power more than one bus-powered drive).
SSH back into the Pi and install OMV with the official one-line script:
wget -O - https://github.com/OpenMediaVault-Plugin-Developers/installScript/raw/master/install | sudo bashThis takes 15-20 minutes and the Pi will reboot itself. After it comes back up, visit http://<your-pi-ip> in a browser. The default OMV credentials are admin / openmediavault - change the password immediately under User Management.
In the OMV dashboard, mount your SSD under Storage → Disks, then create a filesystem on it under Storage → File Systems. Create a shared folder under Storage → Shared Folders. Finally, enable the SMB/CIFS service under Services → SMB/CIFS and add a share pointing to your folder. From a Mac, Windows, or Linux machine on your network, you can now connect to the Pi as a network drive at smb://<your-pi-ip> with the OMV username and password.
Step 5: How do you install Jellyfin for media?
20 minutes - stream your music, movies, and TV to any device in the house
Jellyfin is the open-source alternative to Plex - same idea (a media server you can stream from anywhere) but completely free with no cloud account required. It transcodes on-demand for older devices and runs a slick web interface.
SSH back in and install Jellyfin from its official repository:
curl https://repo.jellyfin.org/install-debuntu.sh | sudo bashThe install script handles repository setup, package install, and service start automatically. Once finished, visit http://<your-pi-ip>:8096 in a browser and complete the setup wizard - set an admin user, point Jellyfin at your media folder (typically /srv/dev-disk-by-uuid-xxxx/media if you store it on the OMV-managed SSD), and tell it what kind of content lives in each folder.
Jellyfin clients exist for Apple TV, Android TV, Fire TV, Roku, iOS, and Android, plus the web interface works on any browser. The Pi 5 can comfortably handle one 1080p stream at native quality and two simultaneously if it does not need to transcode. For 4K, you will want pre-encoded H.265 files; the Pi 5 cannot transcode 4K in real time.
Step 6: How do you install WireGuard for a private VPN?
20 minutes - encrypted access to your home network from anywhere
WireGuard is a modern, fast VPN. With it running on the Pi, you can connect to your home network from anywhere - making coffee-shop WiFi safe, accessing your Jellyfin library when travelling, or routing all your phone's traffic through your home (and therefore through Pi-hole's ad blocking).
The easiest installer is PiVPN, which wraps WireGuard configuration in a simple wizard:
curl -L https://install.pivpn.io | bashFollow the wizard prompts. Pick WireGuard (not OpenVPN) when asked. Use UDP. Set the listening port to the suggested default (51820). Choose your DNS provider - pick the Pi-hole option if it is available, otherwise Cloudflare.
Once installed, you need to forward UDP port 51820 from your router to the Pi's IP. This is the only port you should ever forward - it is encrypted and well-audited. Then run pivpn add to create a client config; it generates a QR code you scan with the official WireGuard app on your phone, and you are connected.
If you want a primer on home network security beyond VPN, our 10-minute WiFi security guide covers the rest of the basics.
Step 7: How do you set up automated backups?
15 minutes - the boring step that saves your data when the SD card dies
SD cards eventually fail - the question is when, not if. Plan for it from day one rather than weeping when it happens.
Two layers of backup cover most failure modes. First, take a periodic image of the SD card itself so you can restore the OS and Pi-hole/OMV/Jellyfin/PiVPN configurations after a card death. The simplest approach is to power down the Pi monthly, pull the SD card, and use Win32DiskImager (Windows), Apple Pi Baker (Mac), or dd (Linux) to image it to a file on your laptop. Restoring from that image takes 15 minutes versus 4-6 hours of reinstalling everything.
Second, for the data on your SSD, set up rsync via OMV's built-in scheduling. OMV → Services → Rsync → Tasks lets you schedule a nightly sync from one folder to another. Plug a second cheap external drive into a powered USB hub and back the SSD up to it nightly. Combine that with a quarterly off-site copy (manually carry a portable drive to a relative's house) and you are protected against drive failure, theft, fire, and the dreaded ransomware.
What should you add next?
The natural next steps once the four core services are humming
Once the four core services are stable, the natural next additions tend to be:
- [Home Assistant, the open-source smart home automation platform,](/blog/home-assistant-add-ons-install-first/) - for smart-home automation. The Pi 5 can run both Home Assistant OS in a VM or via Home Assistant Container in Docker, but if smart home is your main interest, install it on a separate Pi and keep this one as the always-on services box. See our Home Assistant setup guide.
- Nextcloud - your own private Dropbox/Google Drive replacement. Heavier than the four services here but viable on a Pi 5.
- Vaultwarden - a self-hosted Bitwarden-compatible password manager. Lightweight, encrypted, and completely yours.
- Local LLM with Ollama - run Llama 3.2 3B or Phi-3 Mini on the same hardware. A Pi 5 8GB handles 3-billion-parameter models at 4–6 tokens per second, with running costs under £1/month at UK electricity rates.
- Tailscale as an alternative to WireGuard - even simpler to set up, with no port forwarding needed. Slight reduction in privacy because it depends on Tailscale's coordination servers, but for non-paranoid users it is the easier choice.
- Uptime Kuma - a self-hosted dashboard for monitoring whether all your services are still alive.
By this point you are operating a small but real homelab. Many people stop adding new services and start exploring containerisation with Docker Compose so they can deploy and undeploy services cleanly - that is the natural progression past the beginner stage.
Frequently asked questions
Q01How much electricity does a Raspberry Pi 5 home server use?
Q02Can I do this on a Pi 4 instead of a Pi 5?
Q03Do I need a domain name to access this from outside my house?
Q04Is the SD card going to be a problem long-term?
Q05What if Pi-hole breaks the internet for the whole household?
Q06Should I use Docker for these services instead of installing them directly?
The first time you successfully load your Pi-hole admin page and see the live count of blocked requests ticking upward, the cost-benefit becomes obvious - you have replaced years of subscription fees and cloud trust with one £130 box that you control. The first time you stream your own film library to your phone in a Premier Inn hotel room, you stop seeing a Pi as a hobbyist gadget and start seeing it as a genuine alternative to a stack of consumer subscriptions.
Stick to the four-service core to start. Once the Pi feels familiar, branch out. The community and documentation around Raspberry Pi home servers is the best in any DIY tech niche - almost any question you have, someone has already answered.