Home Assistant Add-ons in 2026: The 12 Most Useful
The 12 most useful Home Assistant add-ons in 2026: what each does, how to read the security rating, and the add-on vs HACS vs integration choice.
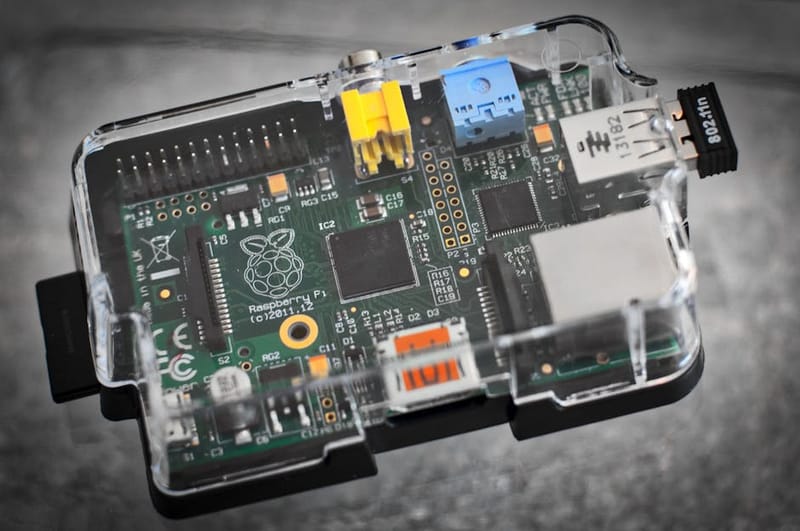
Home Assistant, the open-source smart home automation platform, comes with a vast catalogue of integrations out of the box, but add-ons are where it really starts to feel like a home server. They're not the same thing as integrations - add-ons are full Docker containers running alongside Home Assistant, providing services that the core install can't (or shouldn't) do itself. The Home Assistant supervised install on Raspberry Pi, Home Assistant Yellow, Home Assistant Green, and most x86 mini-PC setups all have access to the official add-on store; Home Assistant Container (the bare-Docker install) does not.
This guide covers the twelve most useful add-ons in 2026, the eight worth installing first on almost any new setup, how to read an add-on's security rating before you trust it, and the install order that minimises friction. Pair with our Home Assistant Raspberry Pi setup guide for the initial install, and our Home Assistant automations for beginners for what to do with these add-ons once they're running. Last reviewed: 11 May 2026.
What's the difference between Home Assistant add-ons, integrations, and HACS?
Knowing the difference before installing anything
Home Assistant's, the smart home automation platform's, extension ecosystem has three distinct layers, and beginners conflate them constantly. Knowing which is which prevents 80% of 'why doesn't this work' questions.
- Integrations (built-in)
- Code shipped with Home Assistant Core - connects to devices and services. Configured via Settings → Devices & Services.
- Add-ons (Docker containers)
- Separate services running alongside Home Assistant - File Editor, MQTT broker, etc. Available only on Supervised / OS installs via Settings → Add-ons.
- HACS (Home Assistant Community Store)
- Third-party custom integrations and frontend cards. Installs into the integration layer. Requires separate setup.
- Where to install add-ons
- Settings → Add-ons → Add-on Store. Official repositories included; community repositories addable.
Add-on vs HACS vs custom integration: which one do you actually need?
A 30-second decision flow
Is it a standalone program?
If you want a database, an MQTT broker, a code editor, a DNS ad-blocker or a camera NVR - something that would otherwise run on its own server - it is an add-on (now 'App'). Install it from Settings -> Add-ons.
Does it connect Home Assistant to a device or service?
A bulb, a thermostat, an energy supplier or a media account is an integration, not an add-on. Check the 3,000+ built-in integrations under Settings -> Devices & Services first.
Is the integration missing from the built-in list?
Then look in HACS (the Home Assistant Community Store), which installs third-party custom integrations into the integration layer. HACS itself is not an add-on - it is a custom integration you add once, then browse from.
Is it a dashboard card, theme or frontend tweak?
That is a HACS frontend resource, not an add-on. Add-ons never change how your dashboard looks - they run services in the background.
What are the most-installed Home Assistant add-ons in 2026?
The community shortlist, beyond the install-first eight
The official store does not publish public install counts, so no list is a true ranking. This shortlist reflects the add-ons that consistently top community recommendations and appear in the official Home Assistant documentation's featured set through 2026. Two names that climbed the charts this year are Google Drive Backup, now the default offsite safety net for self-hosters, and the Cloudflare Tunnel add-on, which gives remote access without forwarding a single port. The eight covered in depth below are the install-first subset; the table adds the four that most setups reach for next.
- File Editor
- Browser-based YAML editor in the sidebar. The first thing almost everyone installs.
- Studio Code Server
- Full VS Code in the browser with autocomplete and Git. Power users install it instead of File Editor.
- Advanced SSH & Web Terminal
- Web terminal plus SSH for troubleshooting, scripts and add-on debugging.
- Samba Share
- Exposes the config folder as a network drive for desktop editing and quick backups.
- Mosquitto broker
- The MQTT broker that Zigbee2MQTT, ESPHome and dozens of integrations depend on.
- ESPHome Device Builder
- Turns cheap ESP32 / ESP8266 boards into custom sensors with no firmware coding.
- Zigbee2MQTT
- Runs your [Zigbee](/blog/matter-vs-thread-vs-zigbee-2026/) network locally through a USB coordinator - no vendor hub or cloud.
- Node-RED
- Visual, flow-based automation for logic too complex for the built-in editor.
- AdGuard Home
- Network-wide DNS ad and tracker blocking - a Pi-hole alternative that lives in the store.
- Frigate NVR
- Real-time AI object detection on camera feeds. Wants a Coral accelerator or a GPU for best results.
- Whisper + Piper
- The local speech-to-text and text-to-speech pair behind a fully offline Assist voice setup.
- Google Drive Backup
- Automated offsite snapshots to Google Drive. The most-installed backup safety net in 2026.
1. Why install File Editor first?
Browser-based YAML editing without leaving Home Assistant
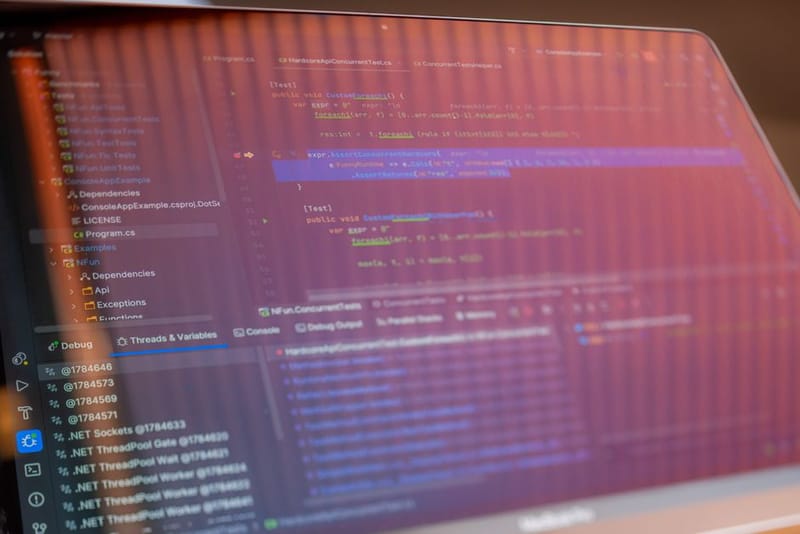
File Editor is the simplest possible YAML editor that runs as an add-on, accessible from Home Assistant's sidebar after install. It opens your config directory directly - configuration.yaml, automations.yaml, scripts.yaml, the lot - with syntax highlighting and a save button. You can edit and save without ever opening a terminal or SSH session.
For most beginners, this is the single most useful add-on. The bulk of Home Assistant configuration in 2026 happens through the UI, but edge-case integrations and custom YAML snippets still require direct config file edits. File Editor turns that from a multi-step SSH operation into a sidebar click.
What it does
Web-based YAML editor with syntax highlighting, accessible from Home Assistant's sidebar.
Why install it first
Many integration troubleshooting steps require config file edits. SSH alternatives exist but require terminal comfort.
Install path
Settings → Add-ons → Add-on Store → File Editor → Install → Start → enable 'Show in sidebar' toggle.
Alternative for power users
Studio Code Server gives you VS Code in the browser with full IntelliSense, Git integration, and multi-file editing. Heavier but better for serious YAML work - install it instead of File Editor if you're comfortable with VS Code.
2. When do you need Terminal & SSH?
Web-based shell access when the UI isn't enough
The official Terminal & SSH add-on gives you a web-based shell that opens directly into the Home Assistant Operating System's container environment. You don't need to set up SSH keys, port forwarding, or anything else - it just opens a terminal in the browser.
You'll need this less often than File Editor, but when you need it you really need it. Examples: clearing stuck log files, manually pulling a custom integration update, running a one-off backup, or restoring from snapshot when the UI is unreachable.
What it does
Browser-accessible terminal session into the Home Assistant OS container. Includes the ha CLI for system management.
Why install it second
Even if you never touch it, having it pre-installed means you can troubleshoot when something breaks. Faster than setting up SSH later under pressure.
Install path
Settings → Add-ons → Add-on Store → Terminal & SSH → Install → set a password in configuration → Start.
Set a strong password
Terminal & SSH gives shell access to the host. Use a long random password. The Home Assistant Yellow / Green / OS install runs network-isolated by default, but the password is your last line of defence.
Samba Share exposes the Home Assistant config directory as a network share that mounts on Mac, Windows, and Linux clients. The practical implication: you can edit YAML in your usual desktop editor (VS Code, Sublime, whatever), drop in custom themes and dashboards via drag-and-drop, and access backup snapshots without going through the Home Assistant UI download flow.
It's not strictly necessary if you're happy editing in File Editor or Studio Code Server, but most experienced users end up using Samba for one specific job: pulling backup snapshots to a desktop or NAS as part of a 3-2-1 backup strategy.
4. Why install Mosquitto MQTT?
Required for Zigbee2MQTT, ESPHome, Theengs, and many DIY devices
MQTT (Message Queue Telemetry Transport) is the lightweight messaging protocol that a lot of smart-home devices use to talk to each other. Home Assistant doesn't bundle an MQTT broker by default - it expects you to provide one. Mosquitto is the official Home Assistant MQTT broker add-on; install it and you can integrate any MQTT-compatible device or service.
You might not need Mosquitto on day one. But the moment you want to add ESPHome devices, Zigbee2MQTT (instead of the built-in ZHA Zigbee integration), Theengs Gateway for Bluetooth sensors, or any custom Wi-Fi sensors with MQTT firmware, you'll need a broker. Installing Mosquitto early is just less friction later.
What it does
Runs an MQTT broker that other devices and integrations connect to. Acts as the central message bus for IoT communication.
Configuration after install
Settings → Add-ons → Mosquitto broker → Configuration → create a Home Assistant user (Settings → People → Users → Add User, mark 'Local only'). Mosquitto uses Home Assistant user credentials for authentication.
Test it's working
After install, go to Settings → Devices & Services → Add Integration → MQTT. Home Assistant should auto-discover the broker and connect.
Common gotcha
Make sure the MQTT user has 'Local only' enabled and uses a password that doesn't contain '$' or other shell-special characters - escaping inconsistencies between integrations cause hard-to-debug auth failures.
5. Why install ESPHome?
Flash ESP32/ESP8266 devices without writing code
ESPHome is the single most transformative add-on on this list for anyone interested in cheap DIY sensors. It runs as a web service inside Home Assistant that lets you build firmware images for ESP32 and ESP8266 microcontrollers - environmental sensors, motion detectors, smart switches, energy monitors - by writing YAML configuration rather than C++ code.
The workflow: connect a $4 ESP32 board via USB or use a pre-flashed device's ESPHome-compatible firmware, define what sensors and outputs it should expose in a short YAML file, click Install, ESPHome compiles and uploads the firmware. The device appears in Home Assistant within minutes with proper entity types, automations, and dashboards.
What it does
Builds custom firmware for ESP32/ESP8266 microcontrollers from a YAML config. Devices auto-discover in Home Assistant.
Hardware to start with
ESP32 NodeMCU dev boards (£4–£8 each on AliExpress / Amazon UK). M5Stack ATOM Lite (£10) for compact sensor nodes. Athom or Shelly devices ship with ESPHome support built-in.
First project for new users
Temperature + humidity sensor in a back room. ~£8 of parts (ESP32 + DHT22), 30 minutes from box to working sensor in Home Assistant. Materially cheaper than commercial Wi-Fi sensors and full control over reporting frequency.
Requires Mosquitto
Strictly, ESPHome uses its own native API now, but many users still configure MQTT as a fallback for visibility. Install Mosquitto first.
6. Why install Node-RED?
An alternative to Home Assistant's built-in automation editor
Home Assistant's built-in Automations editor handles simple if-then-else logic well. Once your automations involve multiple triggers, time-of-day conditions, occupancy detection, weather-aware logic, and queued state machines, the built-in editor starts to feel restrictive. Node-RED is a visual flow-based programming environment that integrates with Home Assistant via the official add-on, offering a much richer automation toolkit.
Whether you actually need Node-RED depends on your appetite for complex automations. Most casual users are happy with the built-in editor for the first six months; serious smart-home builders end up in Node-RED for at least their complex flows. Install when you hit your first 'this is too clunky' moment in the built-in editor, not before - Node-RED has its own learning curve and adds a layer of complexity to your automation debugging.
7. Why install AdGuard Home?
Pi-hole's actively-maintained alternative on Home Assistant
AdGuard Home runs a DNS-level ad blocker that intercepts ad and tracker domains for every device on your network - phones, smart TVs, IoT devices, computers. It's the same idea as Pi-hole (which we've covered separately), but available as a one-click Home Assistant add-on and arguably better-maintained at the moment.
The setup is two steps: install the AdGuard Home add-on and configure your router to point all DNS queries to your Home Assistant box. From then on, every ad and tracker hostname is blocked at the network level - visible on every device including those you can't install an ad blocker on (smart TVs, set-top boxes, kids' tablets, friends' phones).
Setup time
30 minutes for the add-on install + DNS routing config. The router-side change is the part that confuses beginners - point the router's primary DNS server to your Home Assistant IP address.
Performance impact
Negligible on Raspberry Pi 4 / 5 - DNS query handling is light. Lighter than Pi-hole's standalone install because it's sharing the Home Assistant host.
When NOT to install
If you already run Pi-hole on a separate device, don't dual-stack. Pick one. If your home network is router-managed by your ISP and DNS forwarding is locked, AdGuard Home works only on devices you point manually.
8. Why install Frigate?
Local object detection for security cameras
Frigate is the most demanding add-on on this list - it does real-time AI object detection on camera feeds and stores recordings locally without sending anything to a cloud service. Think 'doorbell-camera AI' but on your own hardware: tell Frigate to notify you when a person walks up the driveway, a package is delivered, or a vehicle appears, without paying Ring or Nest a monthly subscription.
The catch is hardware. Frigate needs a Coral USB AI accelerator (~£60) for reliable real-time detection on more than 1–2 camera streams. A Raspberry Pi 4 alone struggles past two streams; Pi 5 handles more but is still constrained. Install Frigate later in your Home Assistant journey, once you have cameras and the Coral hardware to run them properly.
How safe are Home Assistant add-ons? Security and network considerations
What to check before you hit install
Add-ons run as containers with whatever access they request, so they are not all equally safe. The store shows each one a security rating from 1 to 6: 6 is very secure, while a low rating means the add-on asks for host networking, a privileged container, or runs without an AppArmor profile (the Linux kernel module that confines what a process can touch). Official add-ons are maintained by the Home Assistant team; anything you add through a custom repository URL is third-party code with full container access, so install only what you can trace to a reputable project.
The biggest practical risk is exposure. Prefer add-ons that use ingress - where Home Assistant authenticates and proxies the add-on's interface so nothing is open on your LAN - over ones that map a port onto your network. This is not hypothetical: in March 2026, CVE-2026-34205 (CVSS 9.7) let add-ons running in host-network mode expose unauthenticated endpoints to the local network, and it was patched in Supervisor 2026.03.2. That is exactly why keeping the Supervisor updated matters. For remote access, never port-forward port 8123 - use Home Assistant Cloud (Nabu Casa) or a Cloudflare Tunnel add-on instead.
Read the security rating
Each add-on shows a 1-to-6 rating in the store. 6 is very secure; a low score flags host networking, a privileged container, or no AppArmor profile. Only run low-rated add-ons from sources you trust.
Prefer ingress over open ports
Ingress lets Home Assistant authenticate and proxy an add-on's UI, so nothing is exposed on your LAN. Avoid mapping add-on ports to the network unless an external tool genuinely needs them.
Keep the Supervisor updated
CVE-2026-34205 (March 2026, CVSS 9.7) let host-network add-ons expose unauthenticated endpoints to the local network. It was fixed in Supervisor 2026.03.2 - apply Supervisor updates promptly.
Vet community repositories
Official add-ons are team-maintained. Anything added via a custom repository URL is third-party code with full container access - install only what traces to a reputable project.
Never port-forward Home Assistant
For remote access use Home Assistant Cloud (Nabu Casa) or a Cloudflare Tunnel add-on rather than opening port 8123 on your router.
Which add-ons should you NOT install on day one?
Some popular ones add complexity without immediate value
Duck DNS + Let's Encrypt (only when needed)
These let you access Home Assistant over the internet with HTTPS. Useful but adds remote-access risk before you've hardened the rest of the setup. Add only after your local instance is working and you have a specific reason to need remote access.
MariaDB (only for high-volume sensor logging)
Replaces Home Assistant's default SQLite database. Worth it for installs with 50+ sensors logging every few seconds. For typical home use, SQLite is fine and MariaDB is an unnecessary complication.
InfluxDB + Grafana (only if you want long-term dashboards)
Excellent for sensor-history graphs over months/years. Niche need. Skip unless you've decided you want dedicated time-series dashboards.
AppDaemon / pyscript (Python automation alternatives)
Python-based automation environments. Powerful but overkill if Node-RED already covers your visual-flow needs.
Whisper / Piper (local voice assistant)
Local-only voice replacement for Alexa / Google Assistant. Cool but very hardware-dependent (needs a microphone hub and meaningful compute). Phase 3 add-on, not day 1.
What install pattern actually works?
How to actually add these without breaking your setup
Take a full snapshot first
Settings → System → Backups → Create Backup. If anything goes wrong, you can restore in 10 minutes. The cheapest insurance in home automation.
Install one add-on at a time
Install. Start. Check the logs show 'Started successfully'. Use it for a day. Then move to the next. Batch-installing four add-ons at once and having one fail makes debugging much harder.
Read the documentation tab on each add-on
Most add-ons have a Documentation tab in the add-on view. It's faster to read than to discover via trial-and-error.
Enable 'Show in sidebar' selectively
Add-ons with management UIs (File Editor, Node-RED, ESPHome) should be visible from the sidebar. Background-service add-ons (Mosquitto, Samba) shouldn't be - they clutter the sidebar without offering anything clickable.
Keep Auto Update OFF initially
Some add-on updates break integrations. Manually update one at a time after you understand which add-ons you can't afford to break.
Frequently asked questions
Q01Do I need to install all 8 add-ons?
Q02What's the difference between an add-on and an integration?
Q03I can't see the Add-ons menu in Settings - what's wrong?
Q04Does installing more add-ons slow Home Assistant down?
Q05Where does add-on data live? Will I lose it on update?
Q06What's HACS and is it an add-on?
Q07Should I install Pi-hole or AdGuard Home?
Q08Can I run Home Assistant add-ons on a NAS instead of Pi?
Q09Are Home Assistant add-ons safe to install?
Q10Why does Home Assistant now call add-ons 'Apps'?
Home Assistant on a Raspberry Pi: Complete Setup Guide

10 Home Assistant Automations Every Beginner Should Try

What Is Pi-hole and Why Every Smart Home Needs One

Raspberry Pi Home Server: Weekend Build Guide
Run a Local LLM on Raspberry Pi 5: 2026 UK Guide
Sources: Home Assistant official documentation (current at 17 June 2026); Home Assistant Add-on Store official repositories; ESPHome project documentation; Mosquitto MQTT broker documentation; Node-RED Home Assistant nodes documentation; Frigate documentation; AdGuard Home Home Assistant integration documentation; Home Assistant 2026.2 release notes (add-ons renamed to Apps, February 2026); Home Assistant security documentation and add-on security ratings; CVE-2026-34205 Supervisor host-network advisory (fixed in 2026.03.2). This is an editorial DIY guide based on the official Home Assistant ecosystem. Add-ons, repositories, and integration details can change with each Home Assistant release - always check the current Home Assistant documentation before installing.